
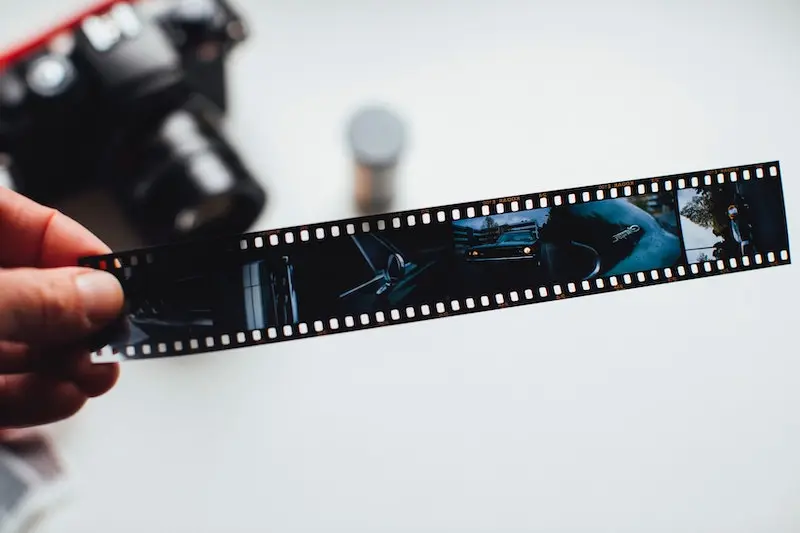
Film photography has been back in fashion for a few years. As with printing photos on paper, you can easily entrust your photos to a professional laboratory. But it’s also possible to develop your films yourself. Before digital photography, photography classes allowed students to learn how to capture black-and-white photos and then develop them on their own.
In addition to being simple, film development at home is a rewarding practice for photography enthusiasts. If the equipment needed for photography can be intimidating, the equipment for home processing can be to an even greater extent. However, this practice is not complicated and can be quickly mastered. This guide provides all the keys to successful film development.
Table of contents
Why develop your photos yourself?
The cost of development, the control over the rendering of the photos and the simplicity of the technique are some good reasons to start developing your photos at home.
Develop your own photos to save money
The cost of development is one of the reasons why it can be beneficial to develop your own film. Today, developing a film in the laboratory costs between €12 and €20 compared to €1 to €3 when you do it at home. Of course, this is only true if developments are carried out regularly. The cost of the products will be quite high if they are only used for one film. On the other hand, for an amateur or professional photographer using several films per month, the price of development in a professional laboratory can very quickly become significant. The necessary equipment can be found online for relatively accessible prices.
Develop your own photos to gain control over your photography
Developing your own photos also means having complete control over the negatives and the rendering of the images. Film photography, unlike digital photography, makes it possible to work with a medium that is directly sensitive to light. This work with light begins with shooting and continues during development.
For example, it is possible to modify the ISO and to play with under-exposure or over-exposure by varying the development time. For black-and-white photography, the choice of developer can also change the rendering of a photo. It is a way to experiment with your style and use techniques that are not carried out in the laboratory.
Developing your own photos is not complicated
Contrary to popular belief, developing one’s own film is not an extremely complicated task. This practice can be summarized in four main steps.
- Place the film on the development reels.
- Mix and pour the chemicals.
- Set a timer.
- Move the tank at predefined intervals.
It is quite possible to develop photos without a darkroom. Darkness is only necessary when transferring the film into the tank, which can be done with a black bag or tent. It is therefore sufficient to find a room without an external light that has access to water. In fact, very little equipment is needed. There are even development kits that can be found online at low prices. This also represents an opportunity to learn a little more about photography.
Developing your own films: the equipment
For beginners, it is advisable to first develop 35 mm black-and-white films, since it is easier and requires less equipment. It should be noted that we’re focusing here on roll films, which are the most popular. Here is a list of the equipment needed to develop films.
- the development tank;
- the reels;
- a changing bag;
- a bottle opener;
- chemicals: developer, fixer, stop bath and water;
- measuring cylinders;
- storage bottles;
- drying tongs;
- a timer;
- scissors.
There are development kits for beginners. Some of these kits can be used for color and black-and-white photo development. It is also advisable to protect yourself against the chemicals as much as possible. We can therefore add to this list a pair of gloves and chemistry goggles, for greater caution.
Develop your film photos in 8 steps
For a trouble-free development process and quality rendering, just follow these steps.
Step 1: Prepare the chemicals
The first step is to prepare the chemicals. Simply use the measuring vessels to dilute the developer, fixer and stop bath separately with the amount of water given in the instructions. The water should be at a temperature of 20°C and ideally distilled. Tap water may suffice, but may produce mineral stains if the levels are too high.
Step 2: Introduce the film into the tank
This step should be performed in the dark. The changing bag must therefore be used, and the film(s), bottle opener, scissors, development tank, and reel(s) placed inside it. Then, simply follow the following procedure.
- Close the bag and put your hands in the sleeves up to your elbows.
- Take the film container, remove the lid.
- Remove the reel, unwind the film to the end and use the scissors to separate the film from the reel.
- Load the film into the spiral reel by loading one end and winding it up.
- Place the film in the development tank.
- Put the lid on the tank.
You can now remove your hands from the bag. To move on to the next step, open the bag and pull out the tank.
Step 3: pre-wetting stage
This involves filling the development tank with warm water using the special light trap cover, which must not be opened completely before the end of this step. When you’ve finished, let it stand for 3 to 4 minutes.
Step 4: Pour the developer
After draining the water from the previous step, the developer must be added to the tank, paying attention to the temperature indicated on the packaging using the thermometer. Certain developers must be shaken in a particular way: the indications on the bottles must be observed.
Step 5: Stop the developer
When the development time is finished, the developer must be poured into the developer with the stop bath, leaving it for the duration indicated on the bottle. Warm water can replace the stop bath, leaving it to work for 2 minutes.
Step 6: Pour the fixative
It’s time to pour the fixative into the development tank. This step consists of fixing the image on the film. This step is essential and should not be overlooked.
Step 7: Rinse the film
The film should then be rinsed by folding the water tank. The image will now be developed and fixed. Before opening the tank, water should be allowed to run for five to ten minutes to remove product residues.
Step 8: Dry the film
It’s time to remove the reels to see the result: the negatives should be visible, they must now be put to dry. For this, it is advisable to:
- remove excess water using squeegee clips;
- place a clip on one end and hang up the film;
- place another clip on the bottom to prevent bending.
This step lasts a few hours and can be performed over a bathtub or in a shower. When this last step is completed, the negatives can be printed in a laboratory or at home, or simply scanned to obtain digital files.
- Everything you need to know to get started in photography
- How do I choose the right lens for a camera?
- How do I choose an external flash?
- What equipment should I use to take portrait photos?
- What equipment should I use to take landscape photos?
- Which computer should I choose for photo editing?
- How do I create a photo studio?
- Lighting solutions in photography
- Equipment for creating sports photos
- Equipment for wildlife photography
- How do I choose a camera tripod?