
With a high-quality camera and a good eye, it’s possible to create the most beautiful images. However, in photography, it is smart and, moreover, customary to add an extra touch to the pictures to make them even more beautiful. This is what photo editing is for, a process that consists of refining images by adding embellishing effects, changing the lighting and colors, etc.
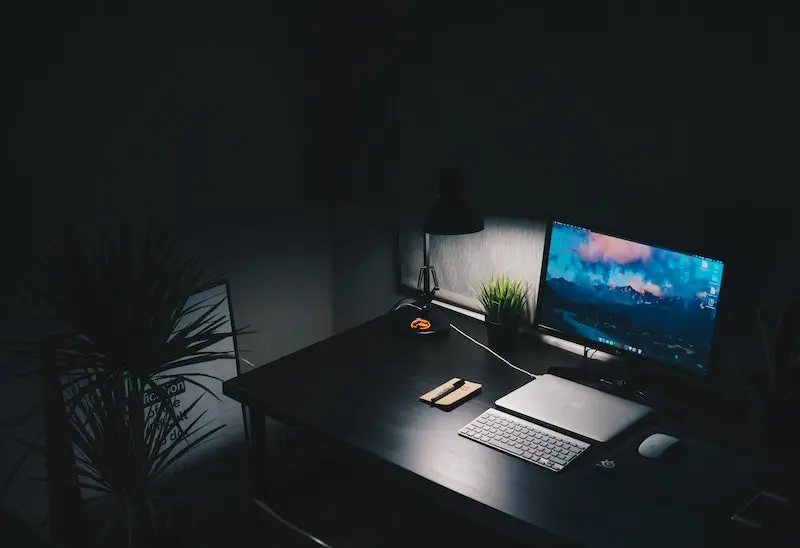
In order to edit photos properly, you need a computer chosen and set up for this purpose. The adjustment includes the calibration of the screen through a series of interventions. Learn step-by-step how to calibrate a monitor before editing photos.
Table of contents
Apply some presettings
Before you can start calibrating a screen for editing, there are certain prerequisites that must be met.
First of all, it is necessary to turn on the screen to be calibrated at least thirty minutes before the operation in order to allow the LED lamps of the monitor to warm up properly and to avoid temperature variations as well as color shifts.
Then, you have to launch the screen saver in order to prevent it from turning off in the middle of the operation. You should also activate the battery saver to prevent any sudden interruption during calibration.
Finally, the monitor must be kept away from any light sources, such as windows, lamps or light spots, while ensuring that the monitor does not receive direct light.
Analyze the display with a sensor
The computer operating system adjustment tools help a lot when calibrating a screen. However, it is strongly recommended to accompany them with an additional tool, namely the colorimetric sensor or colorimeter.
The latter is a device intended to be attached to the screen to analyze its display. The sensor is controlled by means of calibration software used to make the various adjustments. Datacolor’s Spyder is one of the most popular sensors, especially due to its excellent price/performance ratio.
Adjust brightness and contrast
The actual calibration of a photo-editing screen begins with the choice of luminance or brightness and that of contrast.
Adjusting the brightness
Adjusting the brightness of the screen consists of setting the black point and the white point, depending on the brightness and contrast measured by the colorimeter. This adjustment must be done with maximum precision, as the images lose detail and are covered with shadows when the brightness is too low. Conversely, the display looks washed out when the brightness is too strong.
To make sure you don’t make a mistake when setting the brightness, it is advisable to choose a value between 80 cd/m² and 100 cd/m², if you want to print your photos or have them developed. On the other hand, when editing images intended for display on a screen, in particular on the Internet, a calibration of at least 120 cd/m² is recommended.
Setting the contrast
Setting the contrast of the screen means setting the ratio between the black point and the white point of the monitor.
Indeed, the contrast is the property to which we owe the variation of light and shadow in an image. The higher it is, the brighter the images are, and the more detail can be seen.
To adjust it on a screen before editing a photo, we need to consider the intended use of the image. So, in the case of digital use, it is advisable to choose a minimal black display in order to obtain a maximum level of contrast.
On the other hand, for printing purposes, low contrast is required. As such, a maximum ratio of 400:1should be used, which corresponds to a brightness of 80 cd/m² and a black point level of at least 0.2 cd/m².
Selecting the white balance setting
When we talk about white balance in screen calibration, we are referring to the color temperature measured in Kelvin (k). Indeed, we find on a monitor a variety of white colors, namely a cold white which tends towards blue and a warm white, which, for its part, tends towards yellow, orange and red.
Depending on the color temperature chosen, we have images in cold white when the temperature is lowered and photos in warm white when it is raised. The ideal is to opt for a temperature that is neither too hot nor too cold. To achieve this equilibrium, it is recommended to choose a value of 6,500 k, corresponding to daylight.
This value is not only the standard for white adjustment, but is also ideal for high-end displays. However, a lower value of 6,000 k can be chosen, which, in some cases, guarantees appreciable results.
Setting the gamma
The gamma of the screen indicates how quickly an image changes from black to white when displayed digitally. To adjust it, it is necessary to pay attention to the light environment of the room in which the monitor is used.
However, the calibration sensor generally offers a native gamma. Alternatively, you can choose gamma 2.2, which is considered the standard value and is recommended for clear viewing of the screen in a normally lit room.
Values around 2.2 can also be experimented with, as they sometimes offer nice color gradations and some gray on the screen.
Checking the calibration
When you have finished adjusting the various settings, a check must be carried out. At this stage, the software associated with the calibration sensor offers to display it on the screen. The monitor then displays colored patches for a few minutes. At the end of the display, an ICC profile is created. The purpose of the latter is to render and display the right colors on the screen.

Calibrating your screen according to the requirements of your job
The effects of the calibration are not definitive. It is therefore important to know how often to calibrate your screen if you want to maintain optimal color, brightness and contrast levels. To achieve this, you must first and foremost take into account the quality of the equipment used and your professional needs.
To this end, computer screens intended for photo editing should ideally be calibrated every week or at least before each photographic project. You are then guaranteed of having pictures rich in colors and details. Amateur photographers can consider a monthly or quarterly calibration.