
Cull first, almost always.
Selecting your keepers before editing saves hours, reduces decision fatigue, and produces a cleaner final gallery. Editing before culling means spending time and energy on files that will never be delivered. There are a few rare exceptions — they’re covered below.
Introduction
If you’re staring at a fresh shoot and wondering what should happen first, you’re not alone.
Cull first, or edit right away? It’s one of the most common post-production questions among photographers — and the answer is almost always the same.
Cull first.
In most real-world workflows, selecting your keepers before you edit is faster, cleaner, and more profitable. You reduce wasted retouching time, make better decisions, and build a more consistent final gallery.
Editing before culling means spending energy on files that will never be delivered, exported, or used again.
For the full sequence from import to delivery, see our full post-shoot workflow.
And especially when your photos live across drives and catalogs, culling first keeps everything consistent — whether your archive spans folders, Lightroom catalogs, external SSDs, or older projects you still revisit.
The Direct Answer: Cull Before Editing
For most photographers, the ideal order is simple:
- . Import or sync the shoot
- . Cull the obvious rejects and duplicates
- . Narrow down to your selects
- . Edit only the images that made the cut
- . Export, deliver, archive
That order protects both your time and your attention. The larger the shoot, the more important it becomes.
A portrait session with 300 files, a wedding with 4,000 photos, or a corporate event with several photographers all benefit from the same principle: make selection decisions before spending editing time.
This isn’t just about speed. It’s also about consistency. Once you define your keepers first, your editing choices become more deliberate. You’re shaping a final set — not reacting image by image.
Quick Tool Note: Folder vs. Catalog vs. Library-Level Culling
Not all culling happens at the same level.
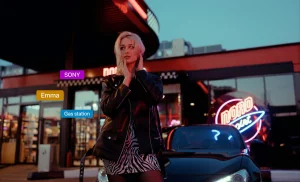
Folder-level culling is the simplest: you review images in one folder or one shoot at a time. Catalog-level culling happens inside software like Lightroom or Capture One, where your selection is tied to that catalog. Library-level culling goes broader: you compare images across shoots, drives, and sources — which is where tools like Peakto become useful for maintaining long-term consistency.
If you’re still deciding which setup fits your workflow, choose your culling software.
Why Culling Before Editing Saves Hours
The biggest reason to cull before editing is simple: you retouch fewer images.
Here’s the math.
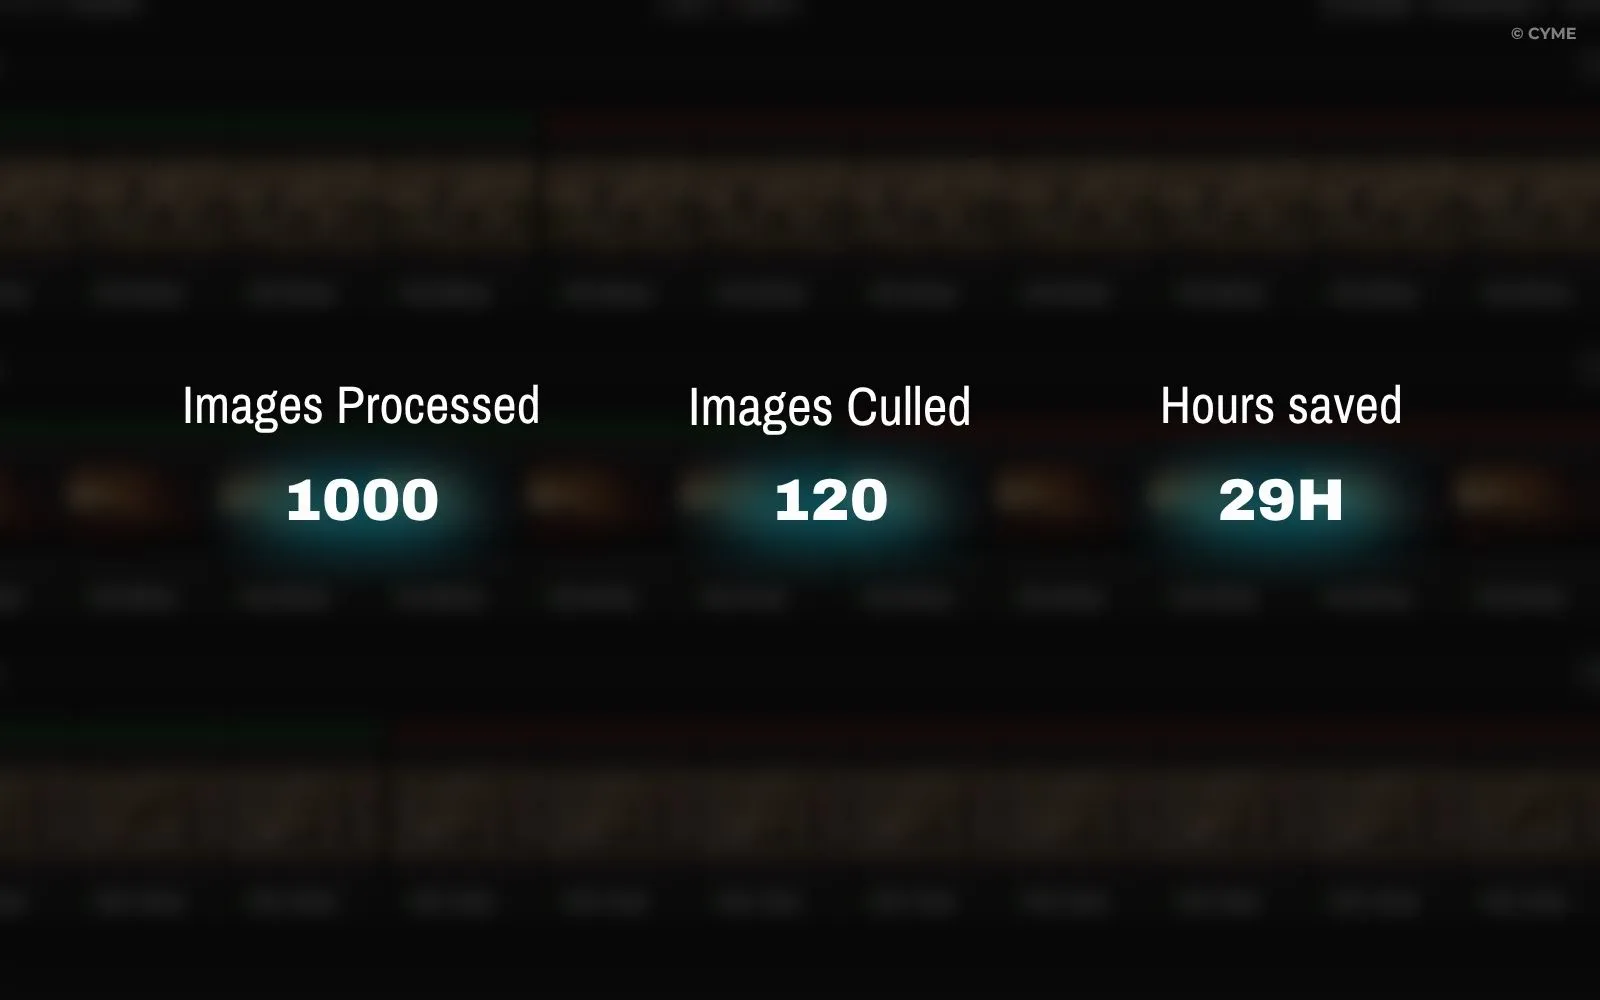
Imagine you come back from a shoot with 1,000 photos. If you start editing before culling and spend just 2 minutes per file, that’s more than 33 hours of work. If you cull first and reduce the set to 120 strong images, then spend 2-3 minutes editing only those, your editing time drops dramatically.
Even a rough first pass changes everything.
Retouch Less, Deliver Better
Photographers often think the time sink is editing. In reality, the hidden waste is editing files that should never have made it that far.
Culling first helps you:
- remove duplicates
- eliminate missed focus shots
- discard poor expressions
- avoid over-investing in “maybe” images
- concentrate your editing energy on the strongest frames
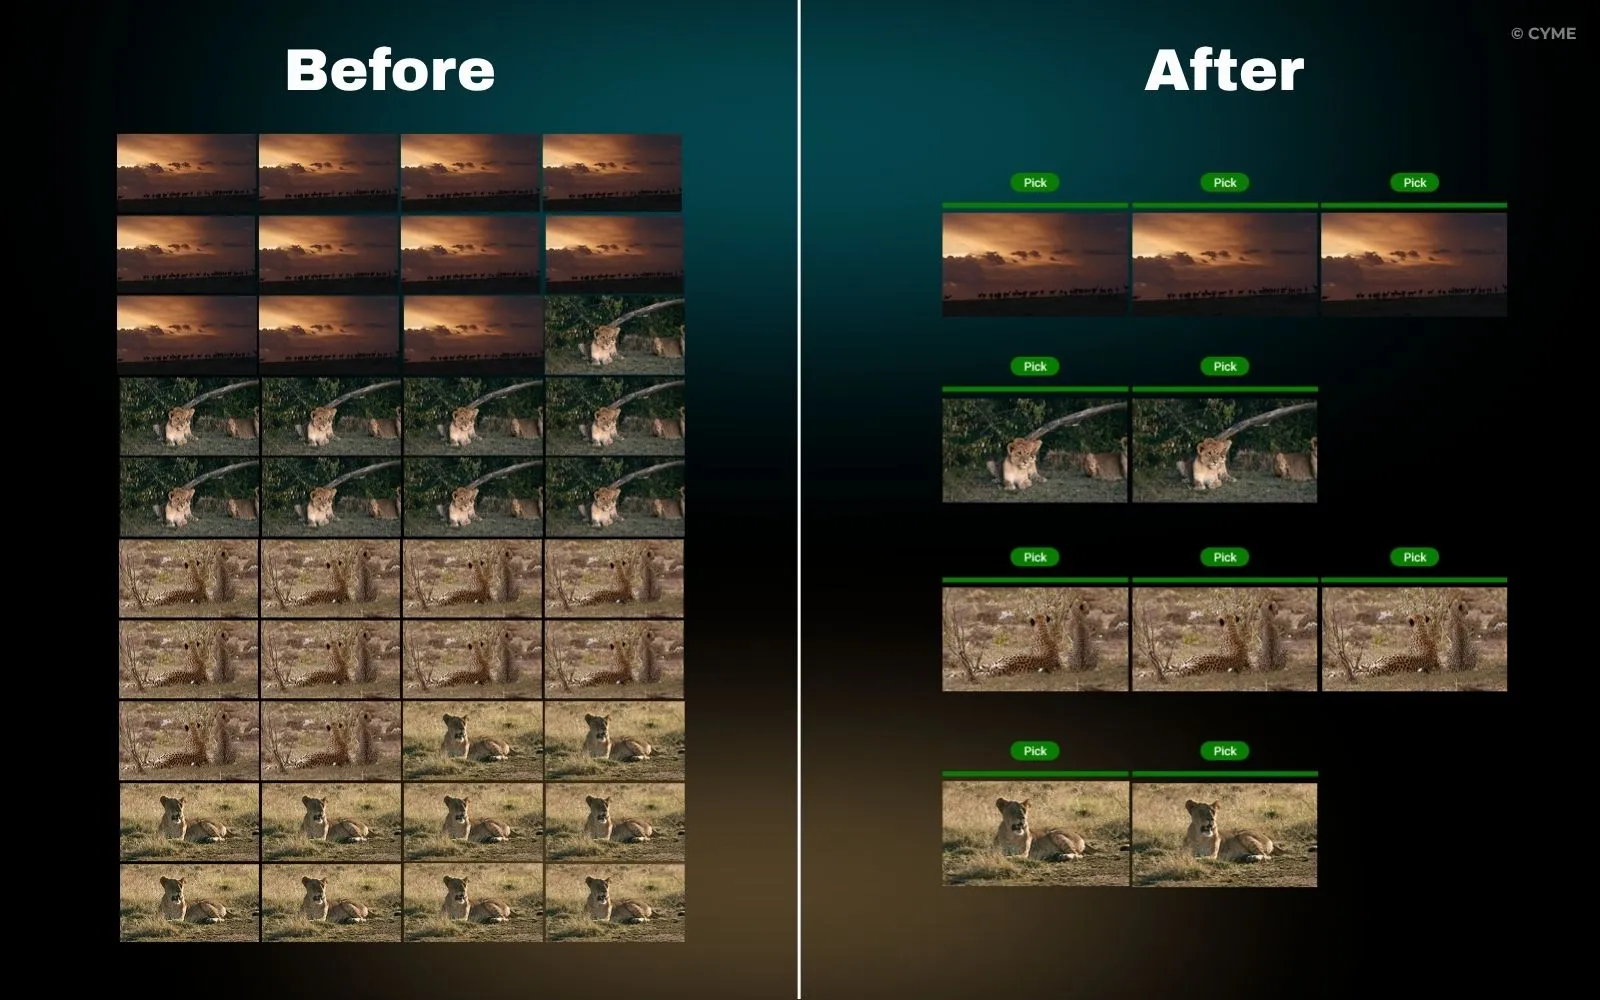
That usually leads to a better final gallery. Clients don’t want to see every near-identical image. They want the best version of the moment.
Reduce Decision Fatigue
The more decisions you make across too many files, the worse your judgment becomes.
Culling has a second advantage: it reduces mental overload. Instead of editing while also deciding whether an image deserves to survive, you separate the two tasks. First, selection. Then, enhancement.
That separation creates a calmer workflow. Your brain isn’t constantly switching between “Is this worth keeping?” and “How should this look?” Those are different kinds of decisions — and they’re better handled in sequence.
For a faster review system, see these tips to save time culling.
What Culling Is — and What It Is Not
Part of the debate comes from people using the same word differently.
Photo culling means reviewing a set of images and narrowing it down to the strongest, most useful, most deliverable files. It’s a selection process — not an editing one.
For a complete breakdown of what culling includes (and what belongs to editing instead), read what culling is (and isn’t).
When Editing First Makes Sense
There are exceptions. They’re just rarer than people think.
1. You need a rendering test first
Sometimes a shoot is technically tricky. The exposure may be more recoverable than it looked on the back of the camera, or a flat RAW file doesn’t reveal its full potential until you apply a basic profile. In those cases, a quick edit on a few representative frames helps you judge the shoot before culling the full set.
2. The shoot has difficult exposure or color conditions
Concert photography, mixed lighting, stage work, or extreme low-light scenes can require a preview adjustment before you can confidently compare images. You’re not really “editing first” in the full sense — you’re creating a more accurate viewing base.
3. The client expects a specific look from the start
In commercial, fashion, or brand work, the style guide may be so important that selection depends partly on how images behave after a quick grade. If the final look is central to the decision, a light edit on a shortlist can be justified before the final cull.
4. You’re comparing frames for one hero image
In high-end portrait or ad work, you may need to test a few variants before deciding which frame becomes the hero shot. This isn’t a reason to edit the whole shoot first — it’s a reason to test a small number of candidates.
So yes, editing first can make sense. But usually only for evaluation samples, not for the full image set.
Recommended Order by Genre
Different types of photography change the volume and the pressure — but not the core logic. In most cases, culling before editing still comes first.
Wedding and other high-volume workflows benefit the most from disciplined selection. If that’s your field, see how to automate wedding photo culling.
Where AI Fits in the Order
AI doesn’t replace the culling-before-editing order. It simply makes parts of it faster. The right way to think about it:
AI handles repetitive tasks. Humans make creative decisions.
AI can help with:
- grouping similar frames
- detecting blur, closed eyes, or technical misses
- surfacing likely keepers
- accelerating first-pass review
- organizing large sets faster
But the final judgment still belongs to you. The strongest image isn’t always the sharpest or most technically perfect one. Emotion, timing, gesture, storytelling, and client relevance are human decisions. So the workflow becomes:
- Ingest the shoot
- Use AI to speed up the first pass
- Make your final culling decisions
- Edit the chosen set
That still means culling comes before editing. AI just helps you get there sooner.
Peakto: Keep Consistency Across Shoots and Archives
This is where the conversation gets more interesting for photographers with growing archives.
Culling before editing isn’t only about one shoot. It’s also about keeping your visual standards consistent over time.
That becomes difficult when your photos are scattered:
- recent work on an SSD
- older jobs on external hard drives
- selects in one Lightroom catalog
- legacy work in another catalog
- portfolio candidates spread across multiple sources
When your archive is fragmented, culling late creates inconsistent standards. You might keep one kind of image in one project, reject similar images somewhere else, and lose track of your own selection logic over time. A library-level tool like Peakto helps here because it lets you review images across sources — not just inside one folder or one catalog. That makes it easier to:
- compare variants stored in different places
- keep your portfolio selection coherent over time
- maintain the same quality threshold across shoots
- revisit old work without rebuilding everything manually
- see your archive as one evolving body of work instead of isolated projects
For photographers managing long-term archives, this matters a lot. Your best image isn’t always in the latest folder. Sometimes the right comparison lives three drives away, inside an older catalog. Culling first at the library level helps you build a more intentional archive — not just a faster editing queue.
How Peakto Helps You Cull Before Editing
The culling-before-editing workflow works best when you have a clear system for comparing and selecting images across your entire library — not just the current shoot.
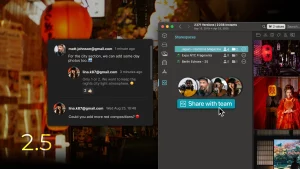
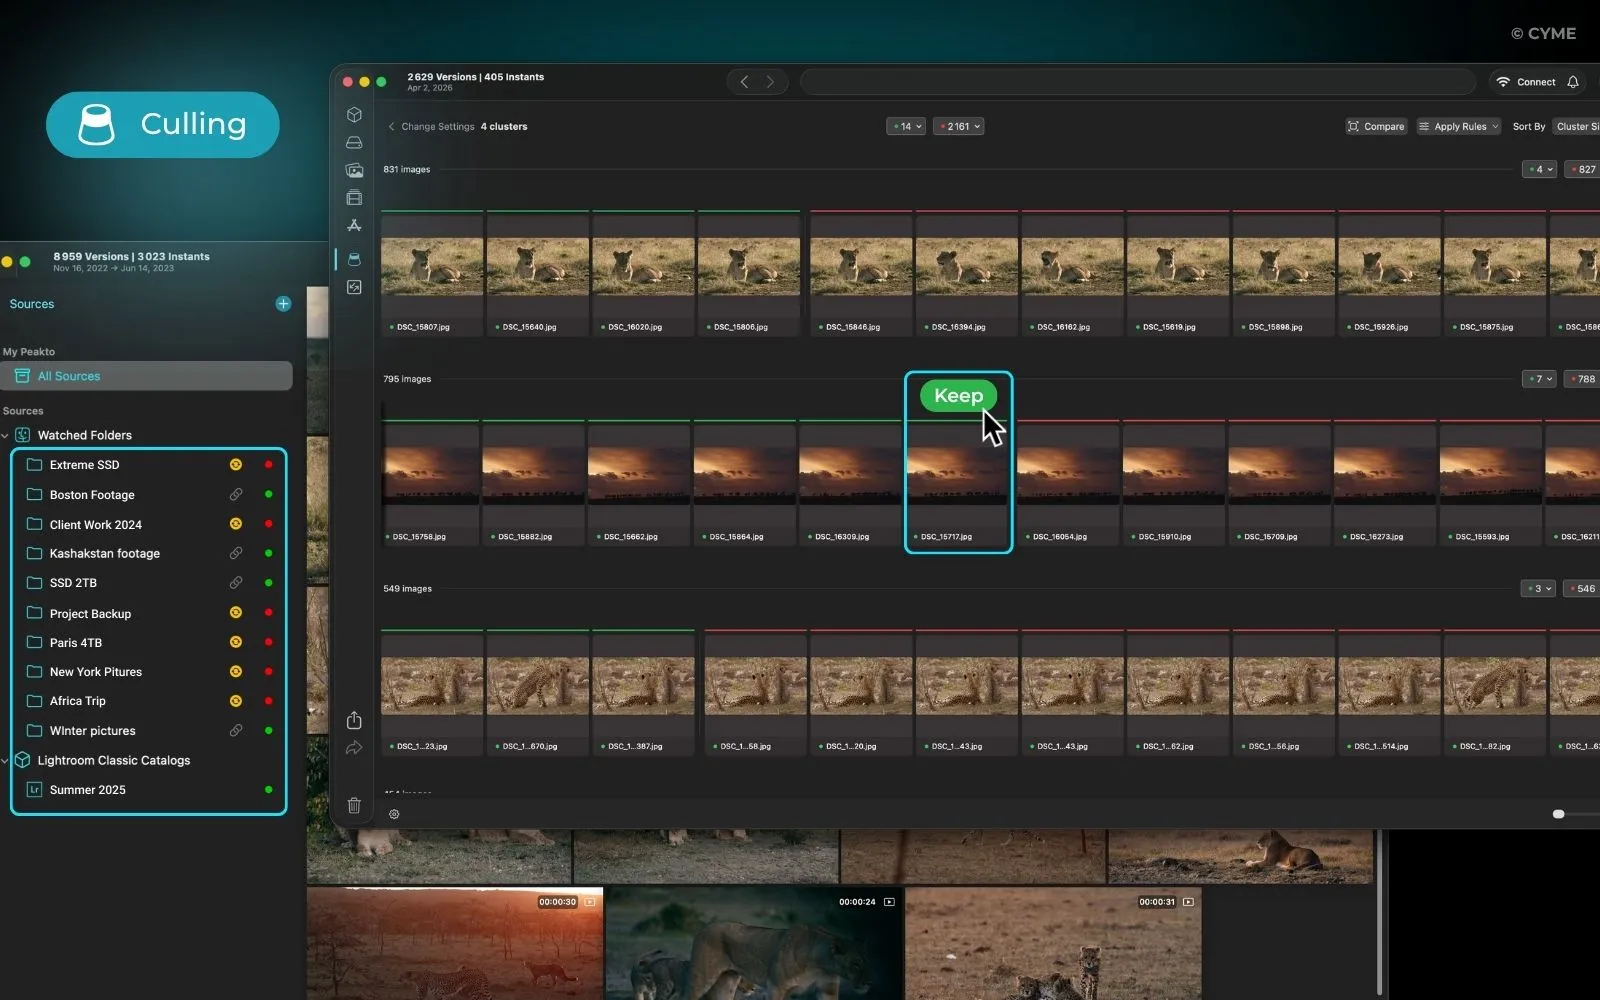
Peakto is designed specifically for this. Instead of culling inside a single Lightroom catalog or folder, Peakto lets you:
- Compare images across multiple drives and catalogs — your recent work on an SSD, older jobs on external hard drives, and legacy catalogs all appear in one unified view
- Maintain consistent selection standards — the same quality threshold applies whether you’re reviewing a wedding from last month or a portrait session from three years ago
- Cull at the library level — instead of jumping between folders and catalogs, you see your entire archive as one evolving body of work
- Build a more intentional portfolio — when you can compare variants stored in different places, your final selection becomes more deliberate and cohesive
This is especially useful when your culling decisions depend on seeing the full context of your work, not just one shoot at a time.Ready to streamline your culling workflow? Try Peakto free and see how library-level culling improves your consistency and speed.
A Simple Working Order You Can Actually Use
If you want a practical default system, use this:
First pass: hard rejects
Remove:
- out-of-focus frames
- accidental shots
- bad expressions
- obvious duplicates
- unusable exposure failures
Second pass: best-of comparisons
Compare similar frames and choose the winner:
- best expression
- best body language
- best timing
- best composition
Third pass: shortlist for editing
Use stars, flags, or color labels to identify:
- deliverables
- alternates
- portfolio candidates
Fourth pass: edit only the selected images
Now your editing time is focused and purposeful. You’re no longer editing to discover what matters. You already know.
Common Mistake: Editing While You Cull
A lot of photographers lose time by mixing both tasks in the same session. They zoom in, crop, tweak white balance, wonder whether the shot is worth keeping, move on, then return later. It feels productive — but it creates friction.
The better approach is to batch your decisions:
- First selection
- Then enhancement
- Then final output
That single change often improves turnaround time more than buying new presets or faster hardware.
FAQ — Culling vs Editing
Should I cull using RAW files or previews?
For speed, many photographers cull from previews first, especially on large shoots. That’s fine for first-pass selection. But when exposure, focus, or subtle detail really matters, confirm with the RAW file before making final decisions.
A practical approach:
- use previews for the broad first pass
- use full-resolution files for close comparisons or difficult images
Should I use stars or flags?
Both work. The best system is the one you apply consistently.
Flags are great for yes/no decisions: keep or reject. Stars are useful for ranking within your selects: shortlist, strong picks, hero images.
Many photographers combine them: flags for first-pass selection, stars for narrowing and prioritizing later. What matters most isn’t the symbol — it’s having a clear logic you use every time.
When should I delete rejected photos?
Don’t rush to delete during the first review unless the rejects are obvious technical failures. A safer workflow:
- Cull and mark rejects
- Finish your selects
- Deliver or export the final set
- Delete rejects only after you’re confident you won’t need them
Some photographers keep rejects for a short buffer period, especially for client work. Others archive everything except hard failures. The right choice depends on storage cost, risk tolerance, and client expectations.
Final Answer: Cull First, Then Edit
For most photographers, the debate has a clear winner.
Cull first. Edit second.
That order saves time, reduces fatigue, improves consistency, and leads to cleaner deliveries. It also scales better as your archive grows. And when your images live across folders, drives, and catalogs, culling before editing helps you stay organized instead of compounding chaos.
Editing first still has a place in a few edge cases — especially when you need to test rendering or judge difficult files more accurately. But those are exceptions, not the default.
If you want the most efficient rule to follow after a shoot, it’s this:
Select what matters first. Perfect it second.