
If you’ve been taking photos for a few years, your Mac probably hides thousands of pictures in every corner — in iCloud, the Apple Photos app, and random folders you forgot existed. Don’t worry, you’re not the only one. According to Western Digital, the average person has over 2,000 photos scattered across several devices. That’s a lot of memories waiting to be rediscovered!
The good news? You can bring order to that chaos in just a few simple steps. You don’t need to be a tech expert or a professional photographer. All you need is a bit of time, a clear plan, and a photo organizer tool that makes the process easier — like Peakto, which helps you see and manage all your images in one place.
Let’s go step by step.
Step 1. Find All Your Photos on Your Mac
Before you can organize, you need to find all the photos stored on your Mac first. macOS saves images in several different places, often without you realizing it:
- The Apple Photos app keeps them in a library inside your Pictures folder.
- Some might be in iCloud Photos, especially if you use “Optimize Mac Storage.”
- And others hide in folders like Downloads, Desktop, or Documents.
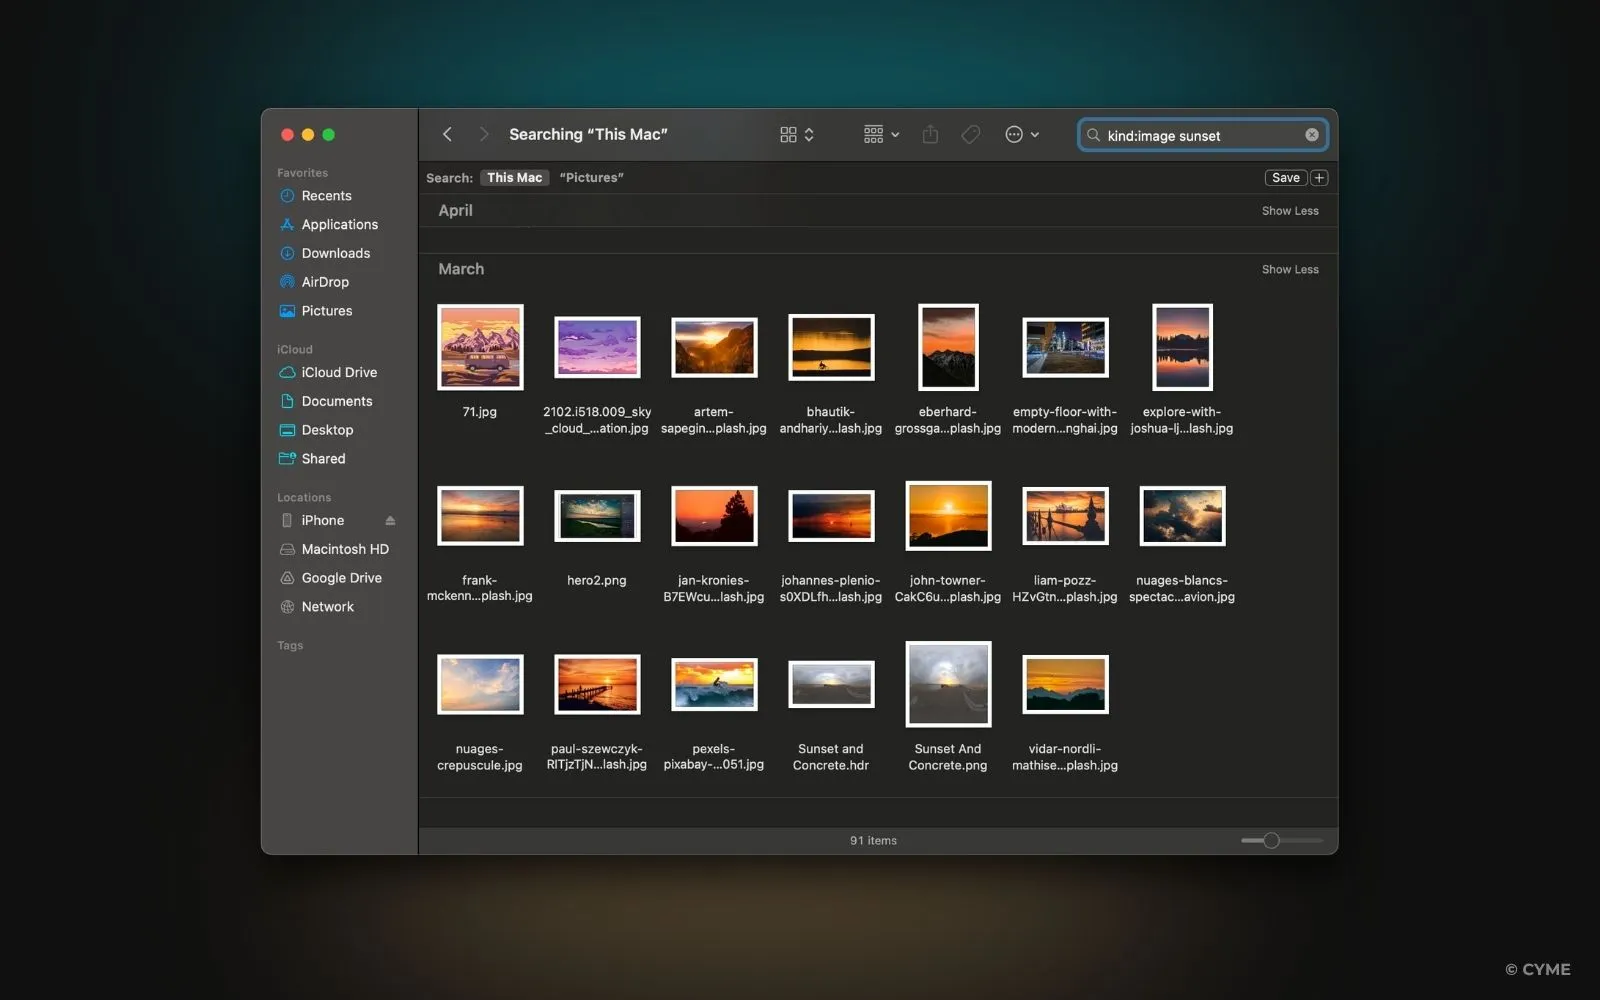
You can use Finder to search for all your images:
- Open a new Finder window.
- Type kind:image in the search bar.
- Make sure you include your Mac’s whole drive in the search.
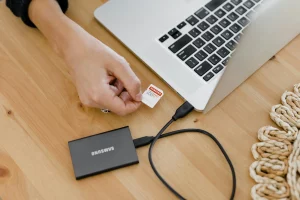
If you’ve used different cameras, iPhones, or SD cards, you might also have photos on external drives. Plug them in — every file counts.
“The first step to order is awareness — you can’t organize what you can’t find.” — Digital Declutter Handbook (2023)
Tip: Tools like Peakto can scan your Mac, Photos Library, and even external drives to show every image in one clean view — no more guessing where things are.
Step 2. Pick Your Best Photos — Fast
Now that you can see all your photos, it’s time to decide what to keep.
If you’ve ever taken a burst of 20 photos just to get one perfect shot, you know how quickly things get messy. You definitely need a faster way to rank photos.
Here’s a secret: you don’t need to keep everything. According to Backblaze’s photo habits report (2024), most people only look at 10% of the pictures they store. That means deleting is healthy!
You can start by looking for:
- blurry or dark shots,
- duplicates,
- screenshots you no longer need.
If you have thousands of photos, this can take forever — unless you let AI help.
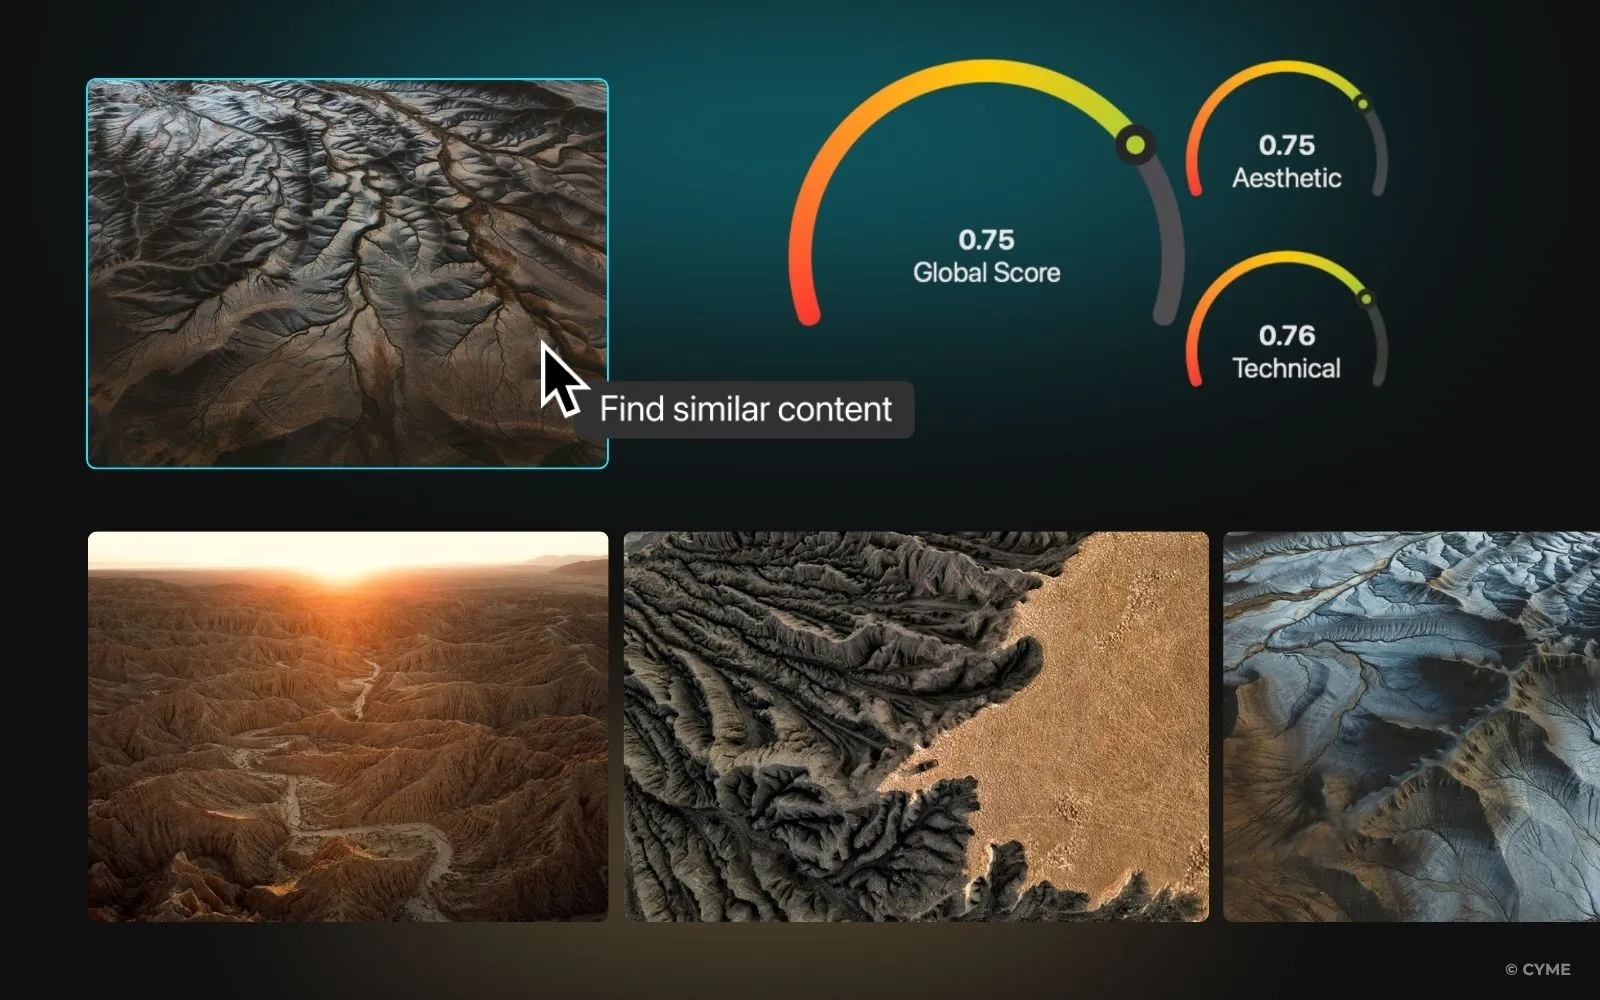
Nowadays, if you’re looking for the fastest way to rank photos on a Mac, tools like Peakto’s aesthetic analysis make it possible to automatically sort images by visual quality. It looks at sharpness, color balance, and composition to find your best shots — all without sending anything to the cloud.
Step 3. Declutter and Keep Your Favorites
Now it’s time to declutter and organize your digital photos!
Duplicates, blurry shots, and old imports take up valuable space. In fact, SanDisk found that most people could free up to 35% of their storage by deleting unnecessary files. Start simple:
- Delete duplicates right after importing.
- Remove screenshots or test shots.
- Keep only a few versions of similar images.
Before deleting anything: Make a quick backup! If you’re wondering how to backup photos safely, follow the 3-2-1 rule — keep 3 copies of your photos, on 2 different types of drives, and 1 backup stored elsewhere (for example, in the cloud).
“Digital minimalism isn’t about less — it’s about clarity.” — Cal Newport, “Digital Minimalism” (2019).
Step 4. Explore Your Photos in New Ways
This is the fun part!
Once your library is organized, you can finally view and explore your images again. Instead of scrolling through endless folders, you can rediscover your memories through beautiful visual views. This is why recommend you to use Peakto.
In Peakto, you can:
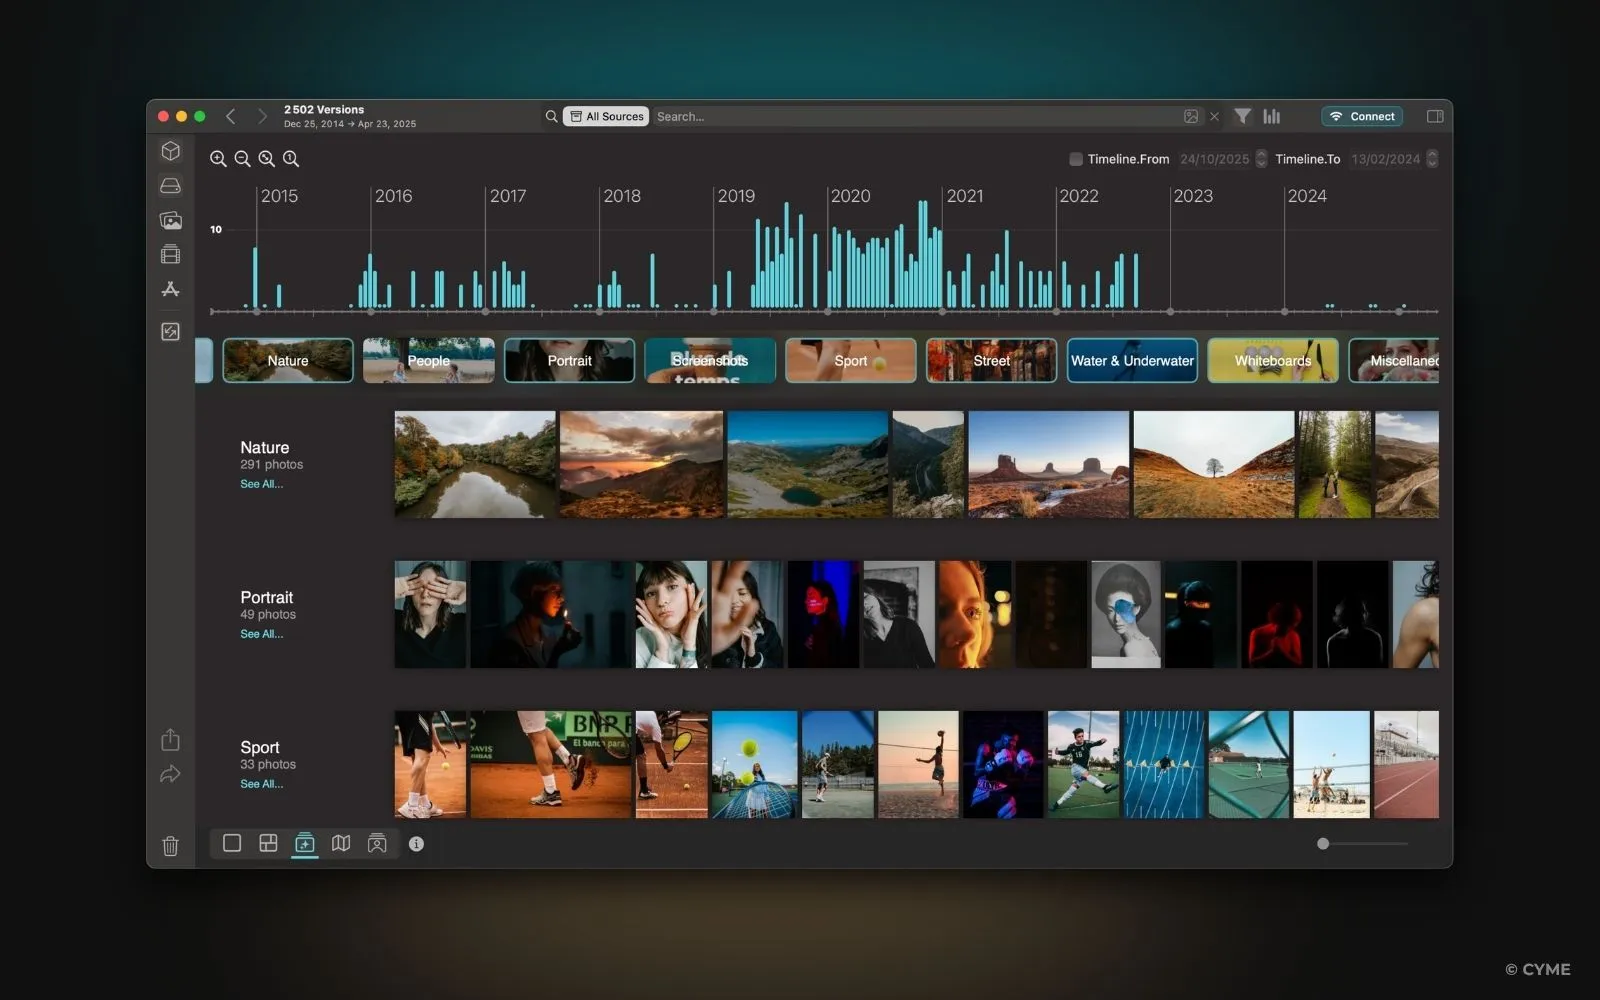
- Use Panorama view to see your whole collection at a glance.
- Browse with the Timeline widget to relive trips and events by date.
- Use the Map viewer to see exactly where each photo was taken.
It’s a much more natural and inspiring way to browse your work — perfect for creative beginners who want to connect with their photos emotionally, not just technically.
Step 5. Keep Your Photo Library Tidy
Staying organized isn’t a one-time effort — it’s an ongoing habit. Once you’ve sorted your collection, keeping it tidy is the real secret to saving time and frustration later. A few small routines can make a big difference. Here’s tips to avoid spending hours deleting photos and to stay organized without much effort:
- Import regularly — don’t wait months to sort new photos.
- Use simple folder names like “2025-10-London-Trip.”
- Cull right away — delete bad shots as soon as you see them.
- Back up often — Time Machine or a SSD works great to store your photos safely.
According to Adobe’s 2024 creative trends report, photographers who maintain a consistent workflow spend 40% less time searching for files. That’s time you can use for shooting, editing, or simply living your memories.
Make Photo Organization Part of Your Creative Routine
Organizing your photos isn’t about perfection — it’s about making your memories easy to find and fun to revisit. Every photo tells a story.
When your library is clean and you know your photos are stored safely, you can see those stories clearly again. Personally, I use Peakto in my routine to gain clarity and save time. Whether you use folders, albums, or an app like Peakto, take it step by step — find, choose, clean, and enjoy.
Your photos deserve to be seen, not lost on a hard drive.